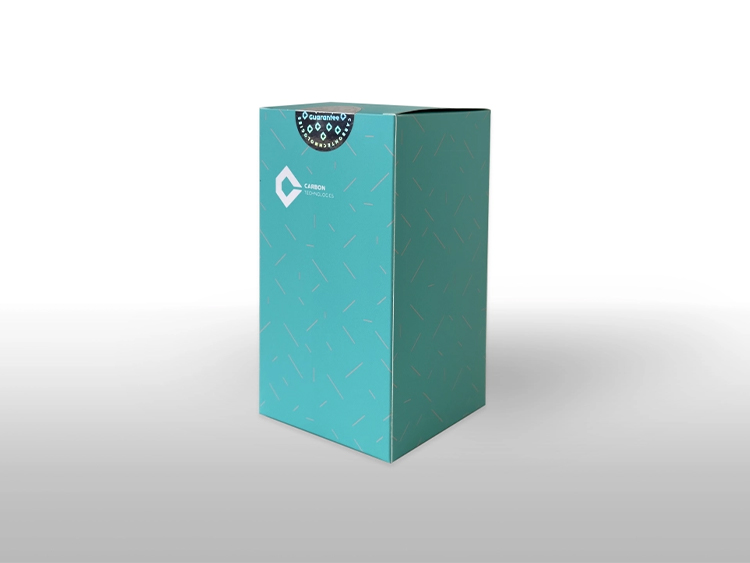
Kit Content
Component | PR242002, 100 preps |
TLB | 18ml |
GLB | 25ml |
BWB1 (concentrate) | 2 x 16ml |
BWB2 (concentrate) | 2 x 16ml |
RRB | 20ml |
RJ-Protease | 2 X 1.25ml |
HiPure DR Column | 100 |
Collection Tube | 200 |
Intended Use
DNall Plus Kit provides the components and procedures necessary for purifying genomic DNA from blood, buffy coat, body fluid, buccal cells, animal tissue, serum and plasma, fixed tissue, cultured cells and bacteria. This assay is intended for in vitro diagnostic use. We recommend all users to study DNA experiments guideline, before starting their work.
Principle
DNall Plus Kit is designed for isolating DNA from various sample types. Lysis is achieved by incubation of the sample in a RJ-Protease enzyme solution and Carbon specific lysis buffer. Appropriate conditions for DNA binding to the silica membrane is achieved by the addition of chaotropic salts and ethanol to the lysate. Then, DNA is selectively bound to the membrane. Contaminants are removed by two specific washing buffers. Pure genomic DNA is finally eluted in rehydration buffer. Isolated DNA is ready to use in downstream applications. It has A 260/ A 280 ratios of 1.7–2, and a symmetric peak at 260 nm by spectrophotometer, confirms high purity.
Sample Collection and Preparation
Recommended starting Material
To reach optimized results it is better to follow as listed here. The size of recommended material is written in the bellow Table.
Table : Appropriate size of starting material
Sample | Size of Starting Material |
Blood* | Up to 250µl |
Buffy coat | Up to 200µl |
Animal tissue | All tissue kind expect spleen: up to 25 mg (Spleen up to 10mg) |
Bacteria cells | 2.5 x 10 8 to 2 x 10⁹ |
Cultured cell | ≤5 x 10⁶ cells |
*White Blood Cell counts are extremely variable from a person to person and therefore, for optimum results its recommended to determine cell counts for choosing the best protocol for purification. For healthy individuals, white blood cell counts normally from 4-10 million per 1ml blood; however, depending on disease state, cell counts may be higher or lower than the normal range.
Sample Preparation
Blood
- It is recommended to collect blood in standard collection tube with EDTA as anticoagulants. Other anticoagulants such as ACD (citrate) and heparin may be used. Notice, Heparin has been shown to inhibit Taq polymerase activity and it is recommended to be avoided, when possible.
- For optimum results, do not store sample at 4 °C for more than 5 days.
- Samples stored at -75°C could be used for at least 2 years. Before use, thaw quickly in a 37 °C water bath and keep sample on ice until use.
Buffy Coat
Buffy coat is a leukocyte-enriched fragment of whole blood. Buffy coat contains the majority of the white blood cells and platelets as well as an equivalent amount of genomic DNA (gDNA), when compared to whole blood. For collecting buffy coat is recommended to do as follows:
- Use fresh blood that was collected in standard collection tubes with EDTA as anticoagulants
- Centrifuge 2.5ml of whole blood for 10minutes at 2,500g
- Remove upper plasma portion and carefully collect the cells at the interface by using a pipette and place in a separate tube (An approximately tenfold concentration of cells is obtained using this technique 200µl buffy coat from 2.5ml blood).
Animal Tissue
To avoid less DNA quality and quantity, remember to start with fresh samples. Best storage condition for tissue is at –20°C or –70°C. Avoid freezing and thawing of samples, which results in reduced size of DNA.
All following three ways are possible to use for sample homogenizing:
- Cutting considered tissue into small pieces. Then, transfer the sample in to a clean microcentrifuge tube.
- Using Micropestle alternatively homogenizer or syringe needle to grind the tissue in TLB before addition of RJ-Protease.
- Grounding samples under liquid nitrogen (recommended for samples which are difficult to lyse).
Cultured Cells
Storage: Fresh or frozen samples may be used by DNall Plus Kit. Frozen samples can be kept at -80°C for long time. As a guide, storage preparation stock and conditions are written here.
Cell selection: First, ensure that the cells are in their best possible condition. Select cultures near the end of log phase growth (approximately 90% confluent) and change their medium 24 hours prior to harvesting. Carefully examine the culture for signs of microbial contamination. Facilitate this by growing cultures in antibiotic-free medium for several passages prior to testing. This allows time for any hidden, resistant contaminants (present in very low numbers) to reach a higher, more easily detected level. Samples of these cultures are then examined microscopically and tested by direct culture for the presence of bacteria, yeasts, fungi, and mycoplasmas.
Cell harvesting: Remove all dissociating agents by washing or inactivation (especially important when using serum-free medium). Centrifugation, when absolutely necessary, should only be hard enough to obtain a soft pellet; 100 x g for 5 to 6minutes is usually sufficient. Count and then dilute or concentrate the harvested cell suspension to twice the desired final concentration, which is usually 4 to 10 million viable cells per milliliter. An equal volume of medium containing the cryoprotective agent at twice its final concentration will be added later to achieve the desired inoculum. Keep the cells chilled to slow their metabolism and prevent cell clumping. Avoid alkaline pH shifts by gassing with CO2 when necessary.
Cryoprotection: Cryoprotective agents are necessary to minimize or prevent the damage associated with slow freezing. DMSO is most often used at a final concentration of 5 to 15% (v/v). Always use reagent or other high purity grades that have been tested for suitability. Sterilize by filtration through a 0.2-micron nylon membrane in a polypropylene or stainless-steel housing and store in small quantities (5ml). Some cell lines are adversely affected by prolonged contact with DMSO. This can be reduced or eliminated by adding the DMSO to the cell suspension at 4°C and removing it immediately upon thawing. If this does not help, lower the concentration or try glycerol or another cryoprotectant. Glycerol is generally used at a final concentration of between 5 and 20% (v/v). Sterilize by autoclaving for 15 minutes in small volumes (5ml) and refrigerate in the dark. Although less toxic to cells than DMSO, glycerol frequently causes osmotic problems, especially after thawing. Always add it at room temperature or above and remove slowly by dilution. High serum concentrations may also help cells survive freezing. Replacing standard media-cryoprotectant mixtures with 95% serum and 5% DMSO may be superior for some overly sensitive cell lines, especially hybridomas. Add cryoprotective agents to culture medium (without cells) immediately prior to use to obtain twice the desired final concentration (2X). Mix this 2X solution with an equal volume of the harvested cell suspension to obtain the inoculum for freezing. This method is less stressful for cells, especially when using DMSO as the cryoprotectant.
Cooling rate: The cooling rate used to freeze cultures must be just slow enough to allow the cells time to dehydrate, but fast enough to prevent excessive dehydration damage. A cooling rate of -1°C to -3°C per minute is satisfactory for most animal cell cultures. Larger cells, or cells having less permeable membranes may require a slower freezing rate since their dehydration will take longer. Transfer from the cooling chamber or device to the final storage location must be done quickly to avoid warming of the vials. Use an insulated container filled with dry ice or liquid nitrogen as a transfer vessel to ensure that the cells remain below -70°C.
Thawing: Remove the vial from its storage location and carefully place the vessel in warm water, agitate gently until completely thawed. Rapid thawing (60 to 90 seconds at 37°C) provides the best recovery for most cell cultures; it reduces or prevents the formation of damaging ice crystals within cells during rehydration.
Recovery: Since some cryoprotective agents may damage cells upon prolonged exposure, remove the agents as quickly and gently as possible. Several approaches are used depending on both the cryoprotective agents and characteristics of the cells. Most cells recover normally if they have the cryoprotective agent removed by a medium change within 6 to 8 hours of thawing. Transfer the contents of the vial to a T-75 flask or other suitable vessel containing 15 to 20 milliliters of culture medium and incubate normally. As soon as a majority of the cells have attached, remove the medium containing the now diluted cryoprotective agent and replace with fresh medium.
For cells that are sensitive to cryoprotective agents, removing the old medium is easily accomplished by gentle centrifugation. Transfer the contents of the vial to a 15ml centrifuge tube containing 10ml of fresh medium and spin for 5minutes at 100 x g. Discard the supernatant containing the cryoprotectant and resuspend the cell pellet in fresh medium. Then transfer the cell suspension to a suitable culture vessel and incubate normally.
When glycerol is used as the cryoprotectant, the sudden addition of a large volume of fresh medium to the thawed cell suspension can cause osmotic shock, damaging or destroying the cells. Use several stepwise dilutions with an equal volume of warm medium every 10minutes before further processing to give the cells time to readjust their osmotic equilibrium.
Preparation: It is crucial to use the correct amount of starting material. DNA content can vary greatly from cell to cell. So, counting cells is the most important step before starting the procedure (for more information refer to appendix 3). However, as a guide, the number of HeLa cells after confluent growth obtained in various culture vessels, is given in the bellow Table . After counting and selecting the intended cell volume, continue the procedure with appropriate protocol.
Table Number of HeLa Cells in various culture vessels
Vessel Type | size | Cell Number |
Dishes | 35mm | 1 x 10⁶ |
60 mm | 2.5 x 10⁶ | |
100 mm | 7 x 10⁶ | |
145-150 mm | 2 x 10⁷ | |
Flask | 40-45ml | 3 x 10⁶ |
250-300ml | 1 x 10⁷ | |
650-750ml | 2 x 10⁷ | |
Multiwell-plates | 96-wells | 4-5 x 10⁴ |
48-wells | 1 x 10⁵ | |
24-wells | 2.5 x 10⁵ | |
12-wells | 5 x 10⁵ | |
6-wells | 1 x 10⁶ |
Bacteria
Typical yields of DNA will vary depending on the cell density of the bacterial culture and the bacterial species, hence before starting, it’s recommended to determine your bacterial species. As a guide, bacteria culture preparation and storage conditions are written here.
Storage: Fresh or frozen bacteria samples may be used by DNall Plus Kit. Frozen samples can be kept at -80°C for long time. As a guide, storage preparation stock and condition are written here.
Bacteria culture:The following protocol is for inoculating an overnight culture of liquid LB with bacteria.
- Prepare liquid Luria-Bertani (LB)
To make 400ml of LB, weigh out the following into a 500ml glass bottle:
- 4 g NaCl
- 4 g Tryptone
- 2 g Yeast Extract
- and dH2O to 400ml
Loosely close the cap on the bottle and then loosely cover the entire top of the bottle with aluminum foil. Autoclave and allow to cool to room temperature. Now screw on the top of the bottle and store the LB at room temperature.
- Use a single, well-isolated colony from a fresh Luria-Bertani (LB) agar plate to inoculate 1–10ml of LB medium.
- Loosely cover the culture with sterile aluminum foil or a cap that is not airtight.
- Incubate bacterial culture at 37°C for 12-18 hour in a shaking incubator
Note: Incubation time can be optimized to increase the DNA yield for a given culture volume. However, it has been observed that as a culture ages the DNA yield may begin to decrease due to cell death and lysis within the culture.
Note: For DNA isolation, bacteria should be harvested in log-phase growth.
Storing condition
- Autoclave microcentrifuge tube or 1-3ml screw cap.
- Grow a fresh overnight culture of the strain in broth. Do not grow the cultures too long. Bacteria strains should be grown to late log phase.
- Label the tube with the strain and date.
- Either 5% to 10% DMSO or glycerol can be used as cryopreservation in the culture medium. Glycerol is usually prepared in aqueous solution at double the desired final concentration for freezing. It is then mixed with an equal amount of cell suspension.
- Aliquot 1 to 1.8ml of bacteria to each vial and seal tightly with screw cap.
- Allow the cells to equilibrate in the freeze medium at room temperature for a minimum of 15 min but no longer than 40 min. After 40 min, the viability may decline if DMSO is used as the cryoprotectant.
- Place the vials into a pre-cooled (4°C), controlled rate freeze chamber and place the chamber in a mechanical freezer at -70°C for at least 24 hours.
- Quickly transfer the vials to liquid nitrogen or at -130°C freezer. After 24 hours at -130°C, remove one vial, restore the bacteria in the culture medium and check viability and sterility.
Recovery of cryopreserved cells
- Prepare a cultured vessel that contains at least 10ml of the appropriate growth medium equilibrate for both temperature and pH.
- Remove the vial containing the strain of interest and thaw by gentle agitation in a 37 °C water bath (or a bath set at the normal growth temperature for that bacterial strain). Thaw the strain rapidly until all ice crystals have been melted (approximately 2min).
- Remove the vial from the bath and decontaminate it by dipping in or spraying with 70% Ethanol. Unscrew the top of the vial and transfer the entire content to the prepared growth medium. Examine the cultures after an appropriate length of time. If the broth shows growth in 1-2 days, streak a plate from the broth and verify that is the correct strain.
Preparation: It is crucial to use the correct amount of starting material. DNA content can vary greatly between different bacteria types. So, counting cells is the most important step before starting the procedure. The input bacterial cell amount should not exceed 2 × 10⁹ cells. For example, for E. coli, depending on culture growth, this is equivalent to 0.5 – 1.0ml of an overnight culture. It is not recommended to exceed 1ml of culture for this procedure. It is important to measure bacterial growth by spectrophotometer before starting the protocol. (For cell counting guideline refer to appendix 3, part B and C). After counting and selecting the intended cell volume, continue the procedure with appropriate protocol.
Before Start
- If GLB or TLB forms precipitate, please warm it to 56°C until the precipitate has fully dissolved. This is due to storage condition and will not influence the efficiency of buffer.
- Not forget to add the appropriate amount of ethanol (96%–100)to BWB1 and BWB2 as indicated on the bottle, before using for the first time, refer to washing buffer preparation.
Washing Buffer Preparation
Before the first use, add appropriate amount of ethanol (96%-100) to each washing buffer tube, then mix thoroughly to prepare washing buffer, refer to the bellow Table. Do not forget to tick the check box on the bottle label to indicate that ethanol has been added. Before each use mix reconstituted buffer by shaking. Storing at room temperature.
Table Washing buffer preparation
Buffer Name | Concentrated Volume | Amount of Ethanol | Final Volume |
BWB1 | 16ml | 24ml | 40ml |
BWB2 | 16ml | 24ml | 40ml |
Maximize DNA Yield
To obtain higher yield of DNA, it is important to follow protocol carefully and pay attention to sample size table (refer to table 2), which is recommended for samples. It is good to know that:
Avoid freezing and thawing samples, which may result in decreased DNA yield and size, compared to fresh samples.
Yield and quality of the purified DNA depend on sample storage conditions. For best results, it is recommended to use fresh samples, however for long-term storage, it is better to freeze samples immediately and store them at -20°C or -70°C. Blood sample should be stored at room temperature for no longer than 24 hours or at 4°C for no longer than 5 days. For long-term storage, freeze blood at –70°C. Storing blood at -20°C, can compromise the integrity of the sample, then results in reducing yields and quality of DNA.
Quality Control Procedure
DNall Plus Kit is tested against predetermined experiments on a lot-to-lot basis according to ISO-certified quality management system, to ensure consistent product quality. For your information, the results of all experiments are accessible by addressing REF and Lot number on web at https://amorph.tech.
Troubleshooting
Here we try to cover as many problems as you may see in using this product, however scientists in Carbon Technical Support Team are eager to answer all your questions. Do not hesitate to contact us for more information.
Symptoms | Problem | Suggestion |
Low DNA yield | Inappropriate sample storage condition | Please refer to sample preparation guidelines. |
Insufficient lysis | Too much starting material results in low DNA yield. To optimize the results, refer to Table 2. | |
Make sure to do pulse-vortexing vigorously after addition of lysis buffer and RJ-Protease. | ||
Incubate mixture of the sample and lysis buffer for an additional 15-20min at 56° C. | ||
Ensure mixing sample completely before incubation step. | ||
Too few cells in the sample | Do the test with new samples. | |
Reagents not applied correctly | Prepare buffers according to the protocol. | |
Make sure ethanol is added to BWB1 and BWB2. | ||
Repeat the procedure with a new sample. | ||
Ethanol from the washing buffer is present in elution | Preform another centrifugation before rehydration step to ensure no remaining of ethanol on column. | |
DNA elution is incomplete | Perform rehydration step once more, by adding another 50-200µl rehydration buffer to column and incubate at room temperature before centrifugation.Check that all previous steps are done appropriately. | |
DNA improperly eluted | The best buffer for DNA rehydration is prepared in the Kit Box. We insist to use the supplied rehydration buffer, however if you want to use water instead, make sure that the pH is at least 7.0, or use 10 mM Tris-HCl Ph≥ 7.0. | |
Degradation | Sample contaminated with DNase | Be sure to do the process in accordance with the reference protocol. |
The genomic DNA was handled improperly | Reduce vertexing times during mixing steps (not more than recommended). | |
Improper sample storage | Please refer to sample preparation guidelines. | |
Too old sample | Old samples stored at inappropriate conditions always yield sheared DNA. | |
Low 260/280 ratio | Sample was diluted in water | It is recommended to use Carbon rehydration buffer for DNA elution, however if you want to use water instead make sure that the pH is at least 7 or use 10 mM Tris-HCl Ph≥ 7.0. |
Protein contamination | This is often due to exceeding the amount of starting material. Follow precisely the respective protocol. If DNA purification is still problematic further reduce the amount of starting material. | |
High 260/280 ratio | RNA contamination | This kit is optimized to extract DNA without RNA contamination. However, if you need to make sure that no RNA contamination is present, you can purchase Prime-RNase A (Cat No. EB983013) separately and perform RNase treatment during the process. |
DNA does not perform well in downstream applications | PCR reaction condition is not optimized | Make sure that PCR condition is optimized by testing: Primer designs and annealing conditionsChanging source of Taq PolymeraseDifferent amount of DNA sample |
DNA was not washed with the provided washing buffer | Ensure the column was washed once with prepared BWB1 and once more with prepared BWB2, respectively. | |
Ethanol carryover | Preform another centrifugation before rehydration step to ensure no remaining of ethanol on column. | |
Do not use standard buffer for DNA rehydration | Use Carbon rehydration buffer for dissolving purified DNA. | |
Clogged Column | Maximum amount of sample exceeded kit specifications | Refer to specifications to determine if amount of starting material falls within kit specifications. |
The lysate mixture is not homogeneous | To ensure a homogeneous solution, vortex for 10-15 seconds before applying the lysate to the spin column. | |
The sample is too much | Use less starting material. The problem can be solved by increasing the g-force and/or centrifuging for a longer period of time until the lysate passes through the column. |
Specific Characteristics
Features | Specifications |
Elution volume | 50-200 µl |
Technology | Silica technology |
Main sample type | Fresh whole blood/ buffy coat/ body fluids/ serum and plasma/ animal tissue/ cultured cells/ bacteria |
Processing | Manual |
Sample amount | 10-25 mg of tissue Up to 2×10⁹ bacteria cells Up to 5 X 10⁶ cultured cells Up to 200 µl blood, buffy coat, body fluid |
Operation time per reaction | Less than 20Min (for whole blood, buffy coat, serum and plasma) Less than 2 h (for animal tissue and bacteria) |
Typical yield | Varies depending on sample type |
Average purity | A260/A280= 1.7-2.0 |
Size of DNA purified | ≈ 50 Kb |
Enzyme | RJ-Protease |
Storage and Safety
Shipment condition is checked by Carbon Technologies. After arrival, all reagents should be kept dry, at room temperature. We suggested storing RJ-Protease at -20°C for longer stability; However, for routine use, it is recommended that RJ-Protease aliquoted to 100 µl volumes before storage at 2-8°C and avoid frequent freeze-thaw. When storage condition is as directed, all reagents are stable until expiration date, as indicated on the kit box.
Due to chemical material usage that may be hazardous, always make sure to wear suitable lab coat, disposable gloves, and protective eyewear. Material Safety Data Sheet (MSDS) for all products and reagents are provided. They are accessible online at https://amorph.tech.